My Top Tips for Testing for Precious Metals in Jewellery
A friend of mine inherited a large trove of her grandmothers jewellery. She asked if we had any quick tips on testing it for gold & silver jewellery. I told her that I had plenty! And, in this article, I will pass these quick gold and silver testing tips to you!
Now let’s jump into it!
Using the Magnet Test:
A quick but essential test to (literally) pull out when buying or checking your estate jewellery is the magnet test. We recommend investing in a small but strong rare earth magnet (Like this one here) to differentiate the good fakes from the real precious metals.
How does a magnet help us test for real gold and silver in jewellery? It’s because these metals are non-ferrous meaning they do not contain iron and will not attract a magnet.

To quickly test if a piece of your inherited jewellery is truly gold, silver, or platinum, slowly move a magnet over the entire item to see if any part reacts or attracts to it.
f the magnet sticks or pulls toward the piece, that’s a red flag. You should not buy or sell it as gold as it is likely some time of costume jewellery. Now, not all costume jewellery is worthless. And if you’d like a consultation to tell which peices are valuable, give us a ring here.
But that’s not all. Please note there are a couple of exceptions to the magnet test!
For example, some natural gemstones can be slightly magnetic. Garnets and Peridot are two common examples of gemstones with magnetism. Another important aspect to know is that many clasps, especially lobster claw and spring ring clasps, contain a small steel spring inside which can cause your chain to attract to the magnet near the clasp. This spring is necessary for the clasp to open and close properly so there is usually no need for concern when this happens.
Just be sure to test is the main part of the piece, like the links, the shank, or main body of your piece. If those parts don’t react to the magnet, it’s a sign the metal is solid gold or silver!
Look for Wear on Silver and Gold Plated Jewellery Items
When you inherit or buy used jewelry, there are warning signs that jump out. One of these is spotting wear and tear occurring on the gold or silver plating.

It takes some time to get used to spotting these signs, but once you do, you’ll avoid many items that look real but aren’t. On the flip side, you’ll also know what you cannot resell as genuine gold or silver, and more importantly, how to disclose items properly to your buyers. After years in this business, I’ve learned that the most common signs an item isn’t real metal underneath are often hiding in plain sight.
Gold and silver plating is worthless. It’s so thin that you can rub it off with your finger over time, and this is actually what helps us identify plated pieces easily.
When examining a piece of jewelery in question, look for a discoloration of the main gold or silver colour. If you spot a little copper or silvery metal showing through in those ‘high-touch’ areas, for example; the inside of a ring band, the back of a pendant where it rubs against skin, or around clasps then you should immediately raise the red flag.
These wear patterns will tell you that the item is plated. And can also help you weed out good fakes which use copper, tungsten or other tricky non-ferrous cheaper alloys underneath a gold or silver facade.
In my experience, the more sophisticated fakes and better-quality costume jewelry often use copper underneath the plating because it is non-magnetic and has a weight similar to 10k gold and sterling silver. This makes it harder to detect at first spot.
So, even if it passes the magnet test and is marked “14K” or “925”, it can still be fake. You must also check if it’s revealing any different colors on high-touch areas. Then you can be sure what you’re dealing with.
Look For Tarnish
Tarnish can be both friend and foe. While it is good to look for tarnished items, not all of them will be sterling silver nor will tarnish indicate that a peice of gold isn’t real. This is important to remember when testing your jewellery for gold & silver.
You’ll encounter a lot of costume jewelry pieces with a thin layer of silver plating that tarnishes over time, giving them that authentic “real silver” appearance. But still are some cheap alloy underneath. Don’t be fooled by this.

When I evaluate a tarnished piece, I follow a specific approach. First of which, includes me not getting my hopes up.
I keep my magnet handy and test for magnetism. If it’s non-magnetic that’s exactly what we’re looking for. Then I check the weight.
The heavier pieces are more likely to be genuine.
Finally, I consider whether the item looks vintage or antique. These older pieces are often unmarked and heavily tarnished due to decades of exposure to the elements. The patina on genuine antique silver has a depth and character that’s difficult to replicate.
Silver plating, like gold plating, is essentially worthless from a precious metal standpoint. However, spotting genuine tarnish patterns comes with experience. Real silver tarnish tends to be more uniform and can range from a light golden color to deep black, depending on exposure to sulfur compounds. Plated items often show uneven tarnishing or bare spots where the base metal peeks through. Remember this when your out buying or selling jewellery.
The Bend Test – Use with Caution
The bend test is one of those old-school methods that’s been passed down through generations of jewellers but it comes with some controversy. I use the bend test sparingly and always as a last resort, particularly on pieces I own or when a client specifically requests it.

Here’s how it works. You apply a small, gentle bend to the jewelry, typically in a less visible area. Yes, I know its pretty blasphemous.
Real gold, being highly malleable, will bend somewhat easily and may not spring back to its original shape completely.
Silver is also relatively soft and will bend, though it requires more force than gold. In contrast, fake jewellry made from brittle materials may snap or crack under pressure. Or it will even crack the thin plating which you’ll see and sometimes hear right away.
Please be warned, this test can and will permanently alter jewelry, especially delicate or antique items.
I only recommend it when other non-destructive tests are inconclusive and the potential value justifies the risk.
Always start with the gentlest pressure possible then always apply more force, but you can’t undo damage.
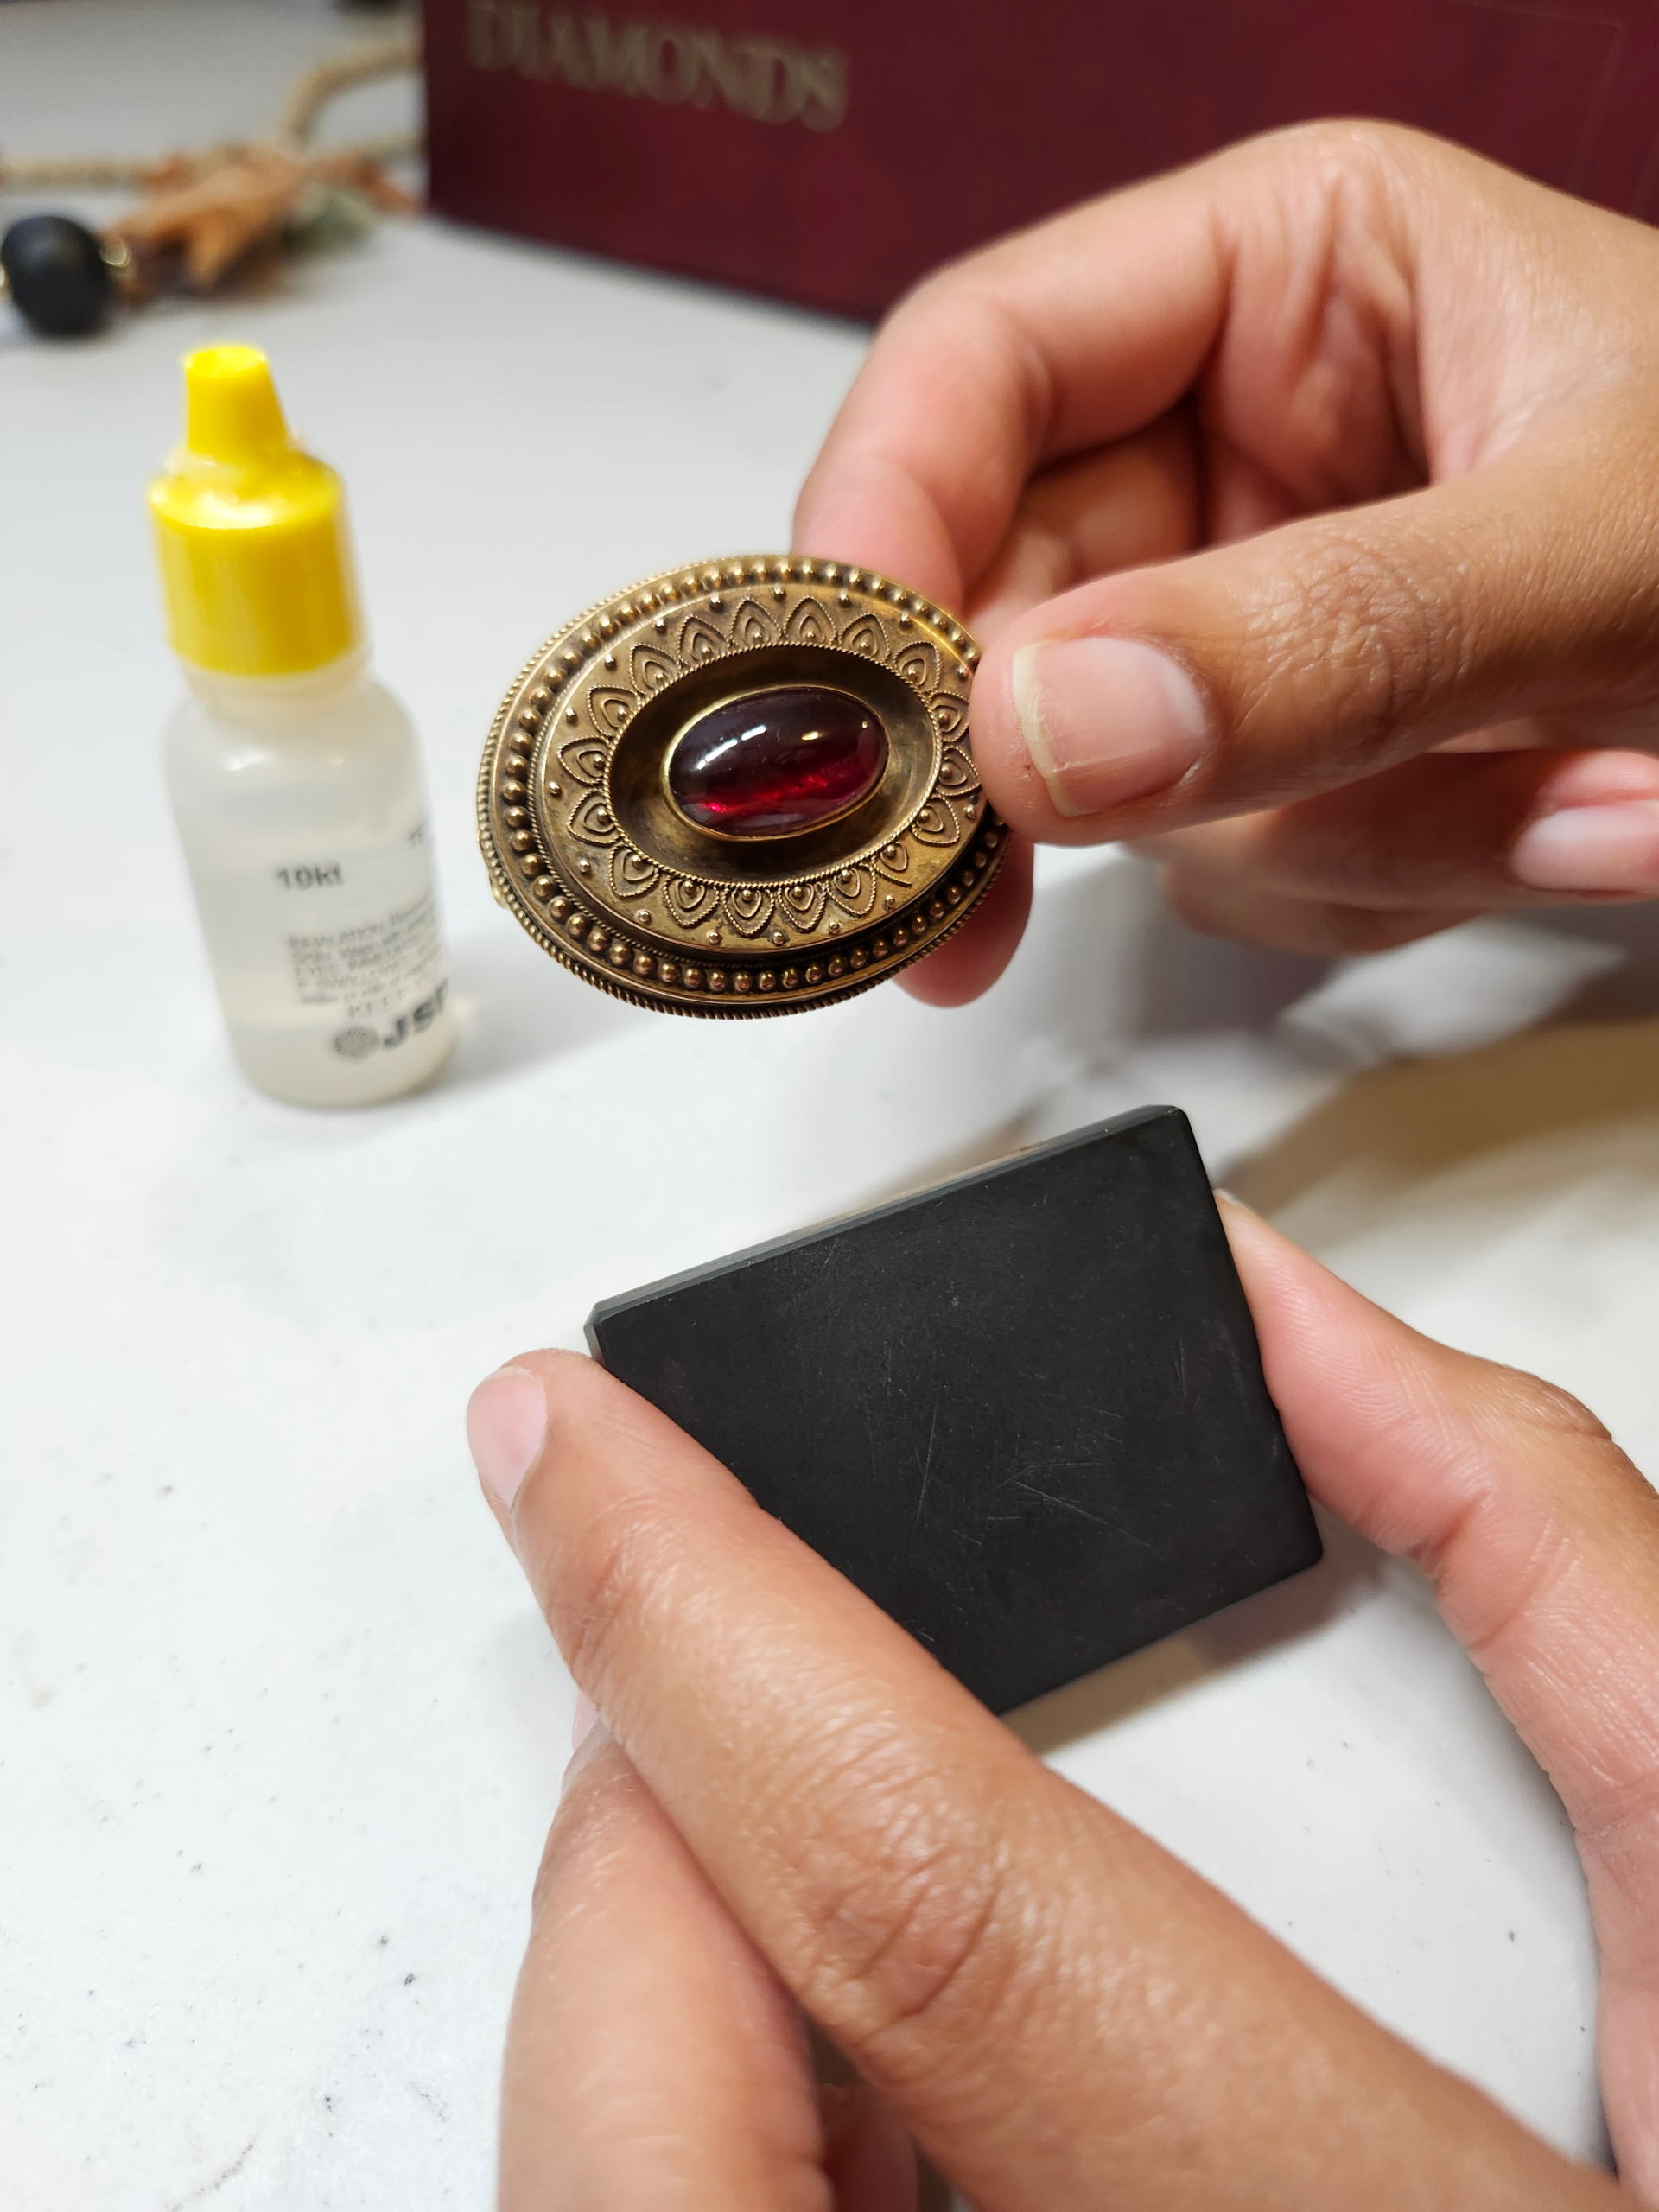
The File and Touchstone Test
After all these years, I still swear by my touchstone. These testing stones have been used for thousands of years and remain one of the most reliable methods for quick field testing. A proper touchstone is made from fine-grit slate, lydite, or chert, traditionally used for assaying and determining gold karat.

For those of us doing quick evaluations… or what I call “run and gun” operations, you can rub your item on a touchstone to test what’s hiding beneath the surface. The streak left behind tells the truth that appearances try to hide. A gold-plated ring might leave a rich copper streak, instantly revealing its true nature. Real gold leaves a distinct golden streak that doesn’t fade, while silver leaves a silvery-white mark.
Investing in a quality touchstone is worth every penny. Paired with testing acids (which I’ll cover in another section), it becomes an indispensable tool in your arsenal. The beauty of this method is its simplicity and reliability with no batteries required, no complicated procedures, just the wisdom of centuries of metallurgical testing at your fingertips.
Remember, each of these tests is a piece of the puzzle. Rarely will one test alone give you a definitive answer. It’s the combination of your observations of the wear patterns, the weight, the magnetic properties, and the streak tests, that paint the complete picture of what you’re really holding.
Other Advanced Testing Techniques
Acid Testing Kits
When basic tests leave you unsure, it’s time to bring out the big gun testing methods. And this one works hand in hand with your touch stones. Acid testing remains the gold standard for determining karat content in gold jewelry. It can also be a huge help for platinum and silver too. A proper acid testing kit contains bottles of nitric acid in different concentrations, each designed to react with specific gold purities. And I’d say they are well worth the investment.
The way it works is beautifully simple: Real gold resists the acid, while base metals dissolve or change color.
For instance, 10k gold will stand up to 10k acid but dissolve in 14k acid. Green reactions typically indicate base metals, while a brown color suggests low-karat gold or heavy gold plating.
X-Ray Fluorescence (XRF) and Conductivity Testing
For those ready to take their testing to professional levels, or if you’re working with particularly valuable or hard-to-test pieces consider asking your jeweler about two advanced tools.
Electronic conductivity testers measure how well electricity flows through the metal, as each precious metal has its own unique conductivity signature.

Even more impressive are XRF (X-ray fluorescence) readers, which can tell you the exact elemental composition of a piece without any damage whatsoever. These machines cost thousands of dollars but provide laboratory-grade results in seconds. Many established jewelers have invested in XRF technology, and a quick test usually costs far less than the peace of mind it provides, especially when dealing with high-value estate pieces.
Testing Your Grandmas Gold and Silver
The path from spotting worn plating to conducting professional-grade scratch tests is the evolution you will go through as you start to evaluate more peices of jewellery. In good time, if you follow these tips, you will begin to recognize what is real and what is fake.
To be good at this you must start with the basics, master them thoroughly, and gradually add more advanced techniques to your repertoire. After all, your inherited jewelry collection deserves nothing less than a thorough and knowledgeable evaluation. Don’t forget. If you’re looking to learn more about pricing, buying and selling estate jewllery check out our guide here.
Leave a Reply